DIY Dog Bed Palace
- Melissa Garchie

- Feb 27, 2021
- 2 min read

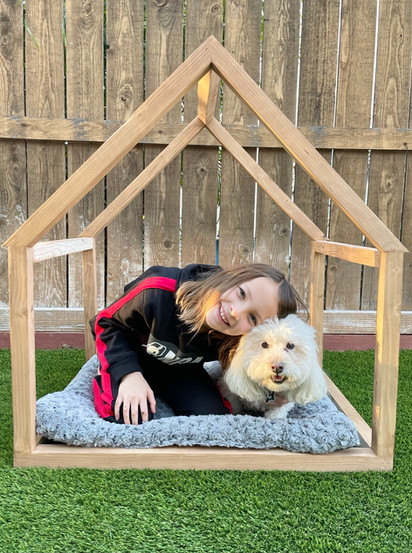

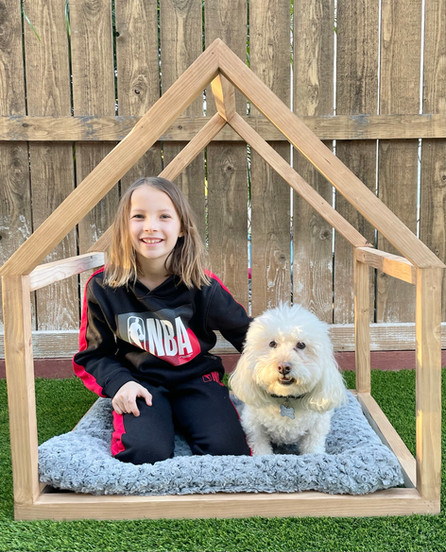


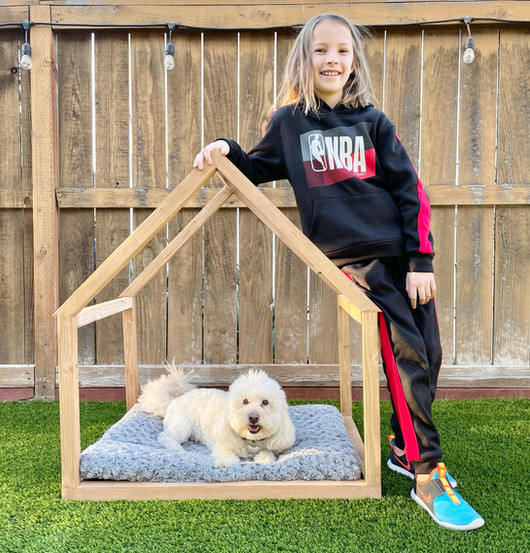


My daughter came into my room a month ago with a drawing of a dog (bed) house she wanted to build for our pup, Bobby. It was the sweetest thing, and I initially told her yes, but after thinking about it more, I realized Bobby would never use it. He has a full blown case of stalker syndrome, and if he can't see me, he launches into a panic mode. Giving him a bed, surrounded by four walls, would just never work for him, so we came up with a compromise.
This was such a fun project to do with Cameron, and if you want to recreate it on your own, here's what you need....
Materials
5 - 2x2 8' boards
Wood Glue (I used Titebond III)
2" Brad Nails (optional)
Wood Filler
Stain or Paint (however you prefer to finish it)
Steps

If you're using the exact dog bed as us, use the following cut list and make your cuts: 5 @ 21" 4 @ 17.5" 2 @ 32.5" 4 @ 23 9/16" (cut at a 45 degree angle on both ends) It's easiest to do this with a miter saw.
2. Sand your boards to the level of smoothness you prefer.
3. Start by making the base. Attach the two 32.5" board with two of the 21" boards. The 32.5" boards will sit inside the two 21" boards, making the dimension of the base 35.5" long x 21" wide. First apply wood glue to your connection points and then use your nail gun and brad nail the joints. The brad nails are really just there to hold the wood together until the wood glue dries.

Alternative methods based on the tools you have on hand:
* You can wood glue and use clamps to hold the joints together until the glue is dry.
* You can use wood glue and then use a drill to screw the joints together. If you go with with this method, I strongly recommend you pre-drill small pilot holes for your screws.
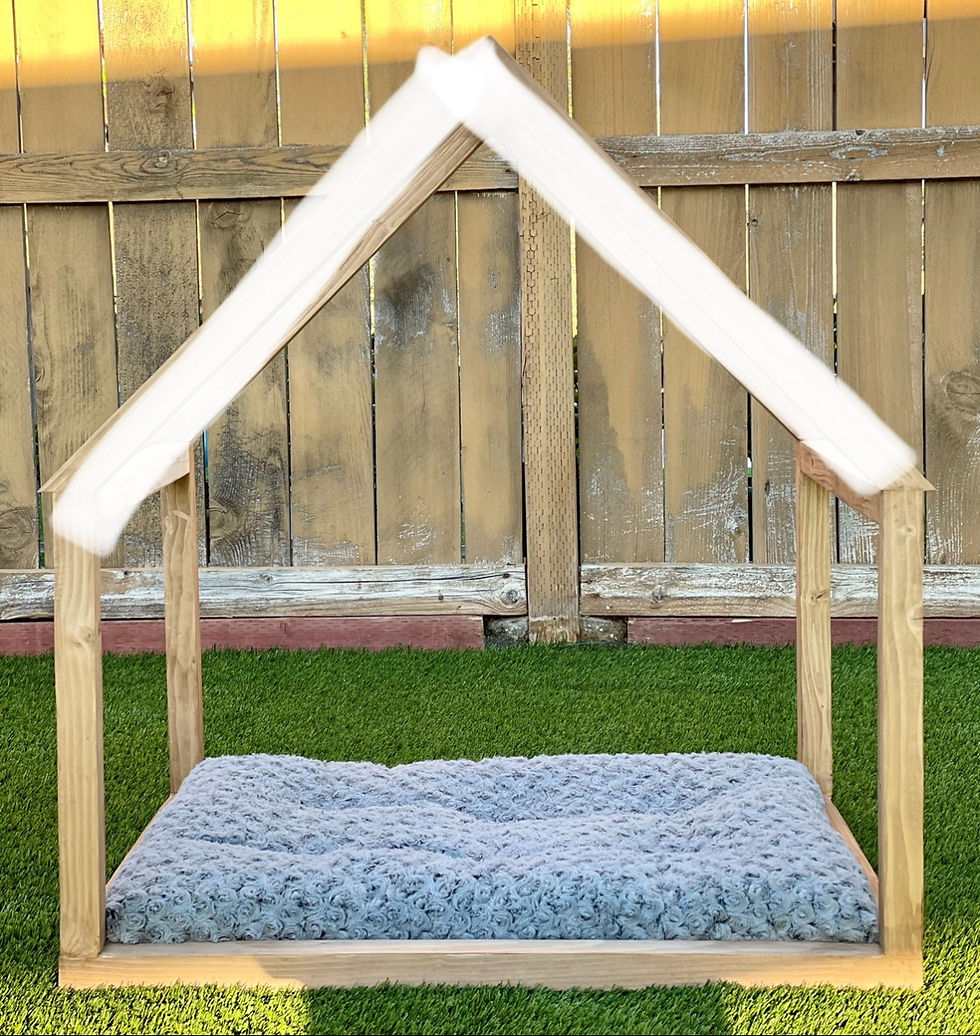
4. Next, make the front and back house shape by attaching two of the 23 9/16" boards together at a point to form a triangle (using the same method you used before).

5. Once your triangle is formed, connect the sides by attaching one of the 17.5" to each side. If you're brad nailing - be careful! It's very easy to mess up the angle of your nail gun when nailing at a point. Hold you gun up close to the tip of 45 degree angle and angle the nail gun down towards the connecting straight board.

6. Attach the front and back of the house to the bottom base. Again, using the same method as before. The easiest way to do this is by placing the house on it's side so you can nail up from the bottom of the base.

7. Now, add your center support by attaching the remaining 21" boards to the sides and center of the points.
8. Allow the wood glue to dry for several hours before moving onto the next steps.
9. The rest is easy... apply wood filler, sand and stain or paint!

Happy building, friends!
-Melissa


This site feels like it was made for people who just want the info without digging around. The text is broken up nicely, so you can skim for a minute and still catch what matters. I ended up clicking into Drift Boss halfway through because the page made it sound simple enough, and yeah, you’re playing almost instantly with that one-button setup. It’s kind of satisfying how quickly it goes from “easy” to “okay, I need better timing” once the platforms start turning. Also nice that the page doesn’t drown you in random extras—just a clean explanation and you’re not stuck scrolling forever. The “How to Play” section is easy to spot thanks to the clear heading and tidy block…
huongnghiep24h.com bữa mình lướt thử vì thấy mấy đứa bạn hay nhắc, kiểu vào xem cho biết thôi. Mình không ngồi đọc hết bài đâu, chủ yếu để ý cách trang họ trình bày. Cái mình thấy dễ chịu là phần kèo bóng đá trực tuyến làm dạng bảng theo cột, nhìn phát là biết đang có những mục nào, không bị rối. Với lại mấy đoạn giải thích kiểu “kèo nhà cái là gì” được chèn ngay trong mạch nội dung nên người mới cũng đỡ phải mò lung tung. Cuộn xuống là thông tin hiện liên tục, không bắt bấm qua lại nhiều. Nhìn chung giao diện khá gọn, và bảng tỷ lệ kèo cập nhật theo các…