Mission Pantry: Dysfunction to Function
- Melissa Garchie

- Jul 9, 2020
- 3 min read
Updated: Aug 15, 2020
YOU GUYS.


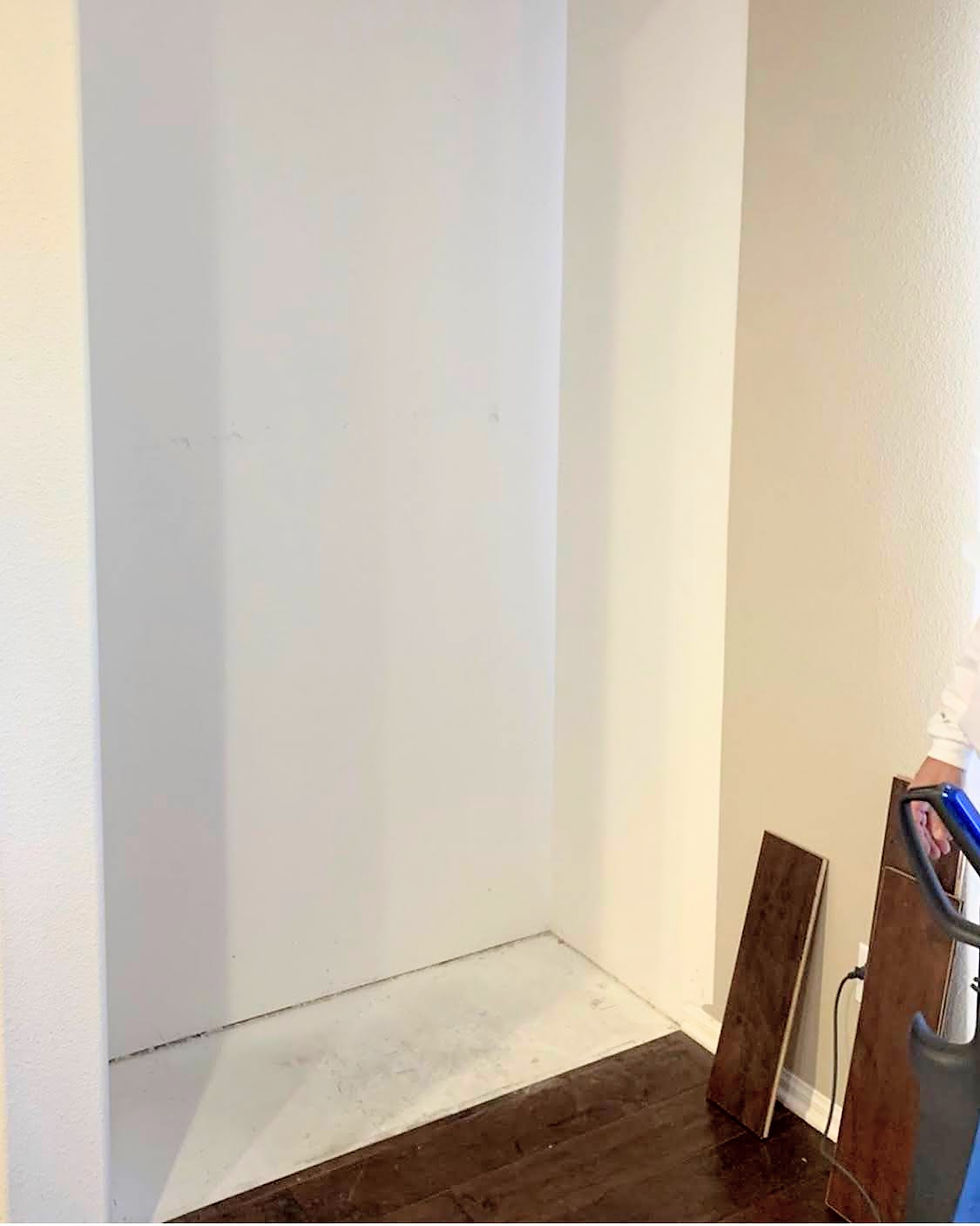
Can we all have a moment of silence for the seven years I struggled with my old panty?
.
.
.
I don't why it took me this long to get to where I am, but I am here now. So, if you have a tall, deep cabinet pantry, please, please, please... I beg you to consider this makeover. Out of all the changes I've made to our builder-grade home, this is by far the best one. Our cabinets were about 9' tall and a little over 2' deep with only six shelves. If you research pantry science (yes, that's a

thing), the recommendation is that shelves inside a pantry are no deeper than 10-12". Anything over 16" comes with a very strong recommendation for a pull-out shelf.
Once I researched it, I realized why all my organizational attempts would eventually fall apart as items would inevitably end up in the black hole of the shelf depths. Attempt number 382 to the right. It lasted all of a few days before people stopped putting things back the right way. Apparently placing bins behind bins makes it difficult for kids and husbands to understand. And let's be honest with each other, because we are friends, right?, If it's not in front of their face (and sometimes even if it is), it doesn't exist until mom points it out, and mom does not have time to assist every time someone needs to access the pantry.
If this sounds familiar, and you are considering this makeover, here are some helpful steps and tips to follow:
1. Measure the space you are dealing with. When you rip out the cabinets, you will gain some space, but measuring with the cabinets in will give you a very good idea of what you have to work with.
2. Use those measurements to work out how you will arrange your shelves. It's a good idea to figure out what containers and organizational systems you will use with your new pantry so you can works those into your measurements. I used a combination of OXO containers and white bins from the Container Store.

3. When removing your cabinets, if they are floor to ceiling, there is a good chance there will be no flooring underneath. We had extra flooring leftover from our builder, but if we didn't, it would have been fairly cheap to find coordinating flooring at a local store.
4. After your cabinets are out, measure again. And again. With your new measurements, check your plans. Do they change? Adjust as necessary. Make sure you're including the thickness of your shelves into your measurements (you will lose some space to that)
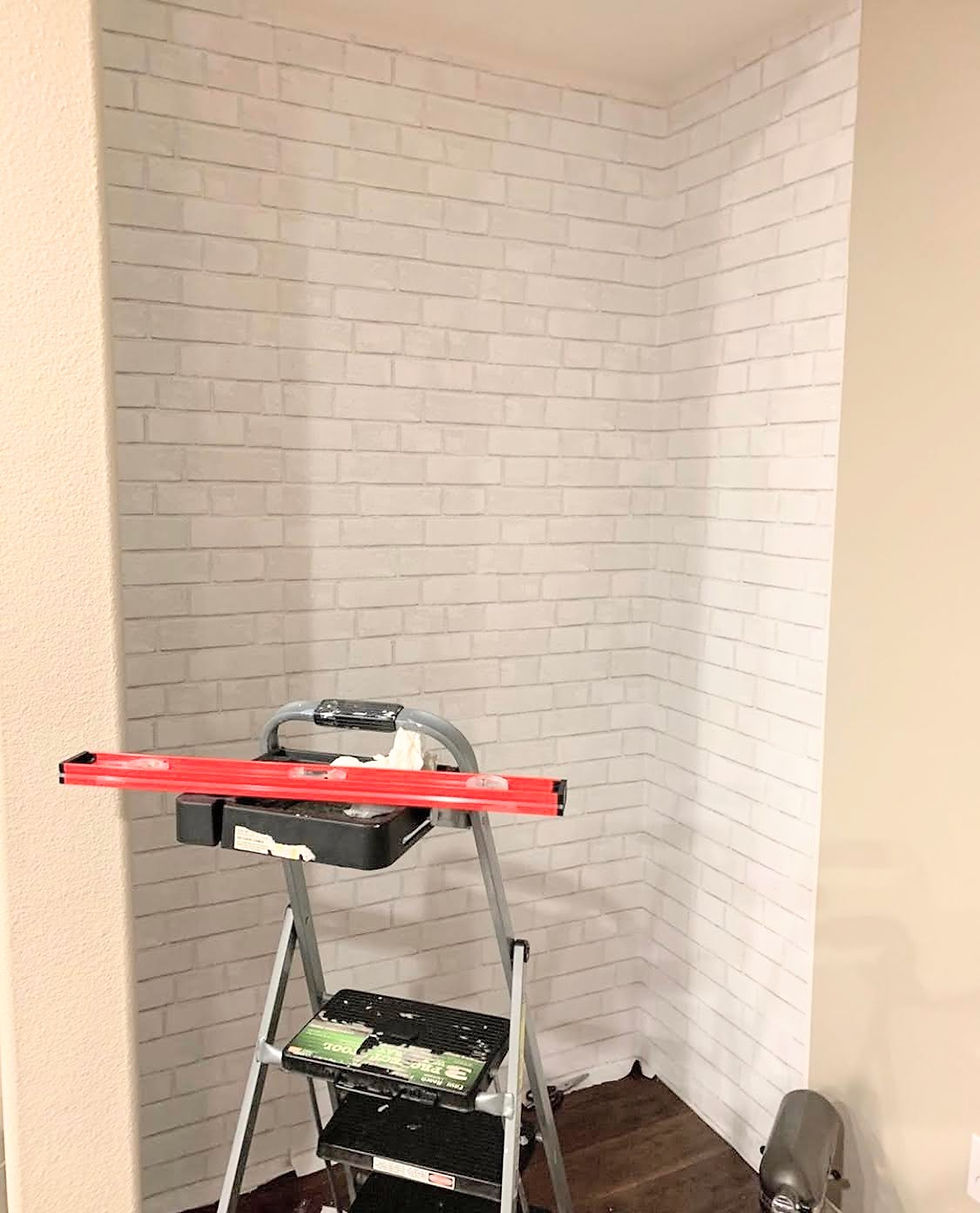
5. Repair, paint or wallpaper the walls behind the cabinets. I used this wallpaper.
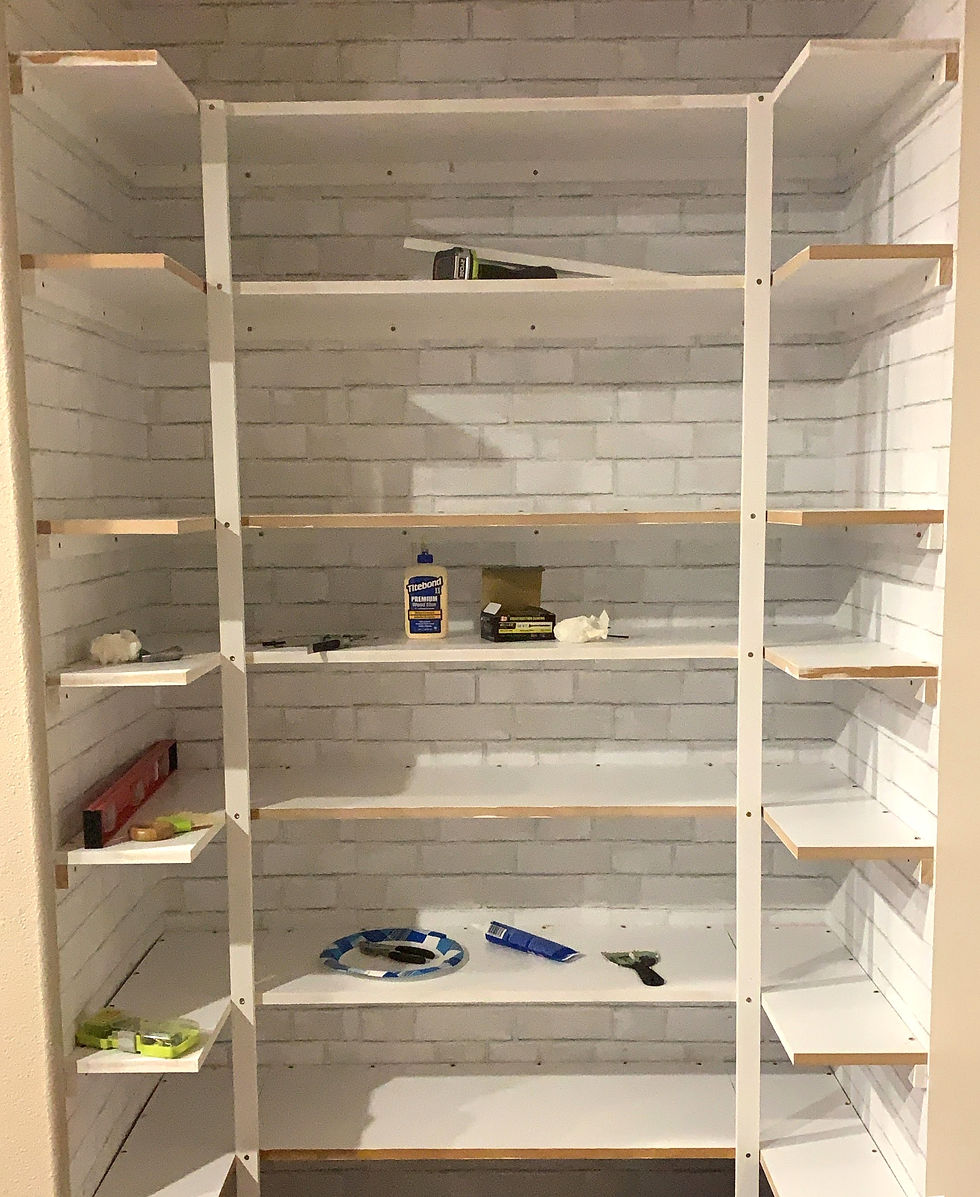
6. Locate your studs and attache your shelf support/frame to them.

7. Install your shelving (I recommend you paint the shelving before install if they will be a different color than the pantry walls).
8. Paint, caulk, touch-up.
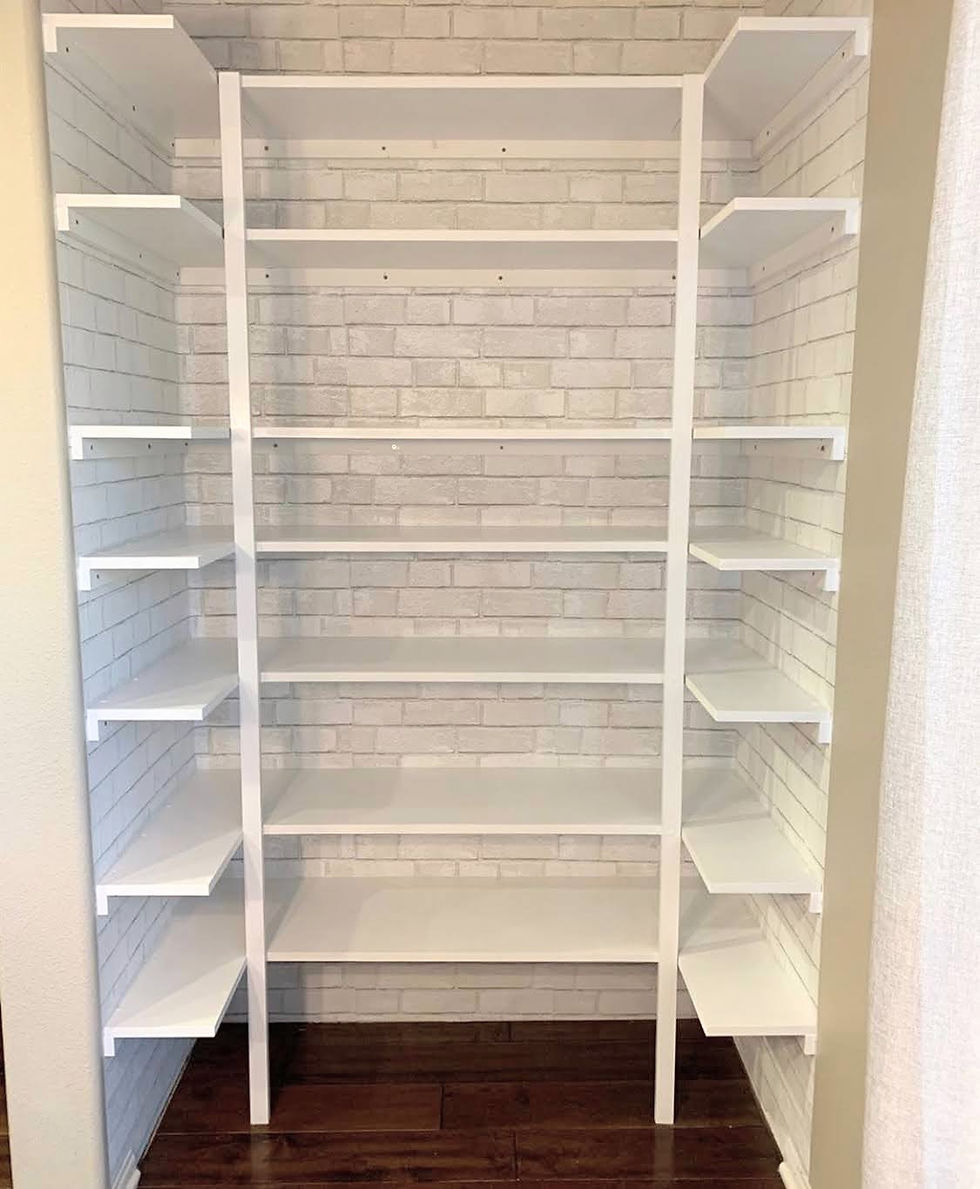
9. Fill 'er up!!

Honestly, you could stop there. I had so many people say that they loved the pantry without the doors. But, for my own sanity, I needed a door.
You can get real creative with this. If my space allowed for it, I would have gone all barn door up in there, but it didn't, so I ended up purchasing these and creating my own door frame. I am the queen of not quite finishing my projects, so per usual, the frame and door still need to be painted and caulked, but that doesn't make me love it any less.

As I mentioned before, this is by far the best change we have made to our builder grade home. We've had this pantry for seven months now and it's still this organized because my kids (and husband) can immediately find anything they are looking for without an assist from mom. While that is exciting enough, another benefit was the addition of more space. I now have so much more stored in my pantry, like small kitchen appliances, than I ever did before. Easy organization AND more space? Sign me up!! In total, and not including the storage bins, the new pantry cost about $550. The doors accounted for most of that cost - around $360. Had I hired this job out, not only would I have less control over the project, but it would have cost thousands of dollars.
I know what some of you are thinking... you can't do this. I would happily tell you you're wrong. This was the first time I've ever done anything like this by myself. I was terrified, and almost didn't do it at all, and now, I can't imagine living my life without knowing I am capable of so much more than I ever thought. I promise you are capable of it too!
To watch the full transformation, visit @melissagarchiediy and find my pantry highlight bubble.


Comments